Saturday, September 28, 2013

Creating My Fall Home

I love fall, don't you? It's cable knit sweaters, football, and the gorgeous colors that nature brings us. This year I wanted to do something fun. I picked the vibrant color of orange to be my Fall accent color . It reminds me of pumpkins and leaves! It works as a great compliment to the teals and neutrals I have throughout the house. It's a beautiful combination! Hopefully, you will enjoy a quick peek into my fall home!


Welcome to my Fall Home!

The Foyer got a big makeover, because I had nothing! I moved this small table and created a warm and welcoming vignette. I found this beautiful table, lamp, and small box at HomeGoods.

Fall in the Family Room
I usually start by changing out my throw pillows. That's the quickest and easiest way to create a new look without too much out of pocket. In my case I decided I was going to give myself a budget of $150 to $200, buuuut I only spent $135. I found this beautiful pillow combo on the left at Kohl's - except the owl pillow, HomeGoods! - on mega sale! One pillow was only $3.29!!! I was so overjoyed I think the people in the store thought I was crazy! ;-)
I wanted it to feel cozy and warm. After I hung the drapes and simply put in the new pillows, it was amazing how different the room felt! The kids had complained that the house didn't feel like a home and now they're all smiles! That's exactly why I do this. Creating my nest for my family is my ultimate goal!

 This cozy orange throw is a family favorite! We are all fighting for this spot!

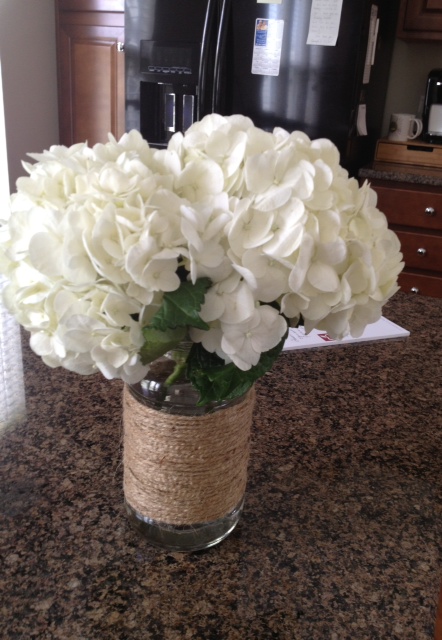
 I tied my simple glass vases with burlap and ribbon and adorned it with a cute group of acorns to give it that fall touch!
 I love the new drapes from PB, they are the Emory Drape in Sable and the Kendra Sheer in brown. I paired them together for more dramatic look! Looooove!

The Mantel

 I used birch wrapped small buckets with succulents on the mantel to add some natural texture.
 I wish these could be real, and soon I will have beautiful pick of fall leaves and branches. For now stems of fall picks, grasses and branches from Michael's will have to do. I try to pick things that look realistic, so it does look like I went out and collected these from nature!

 Owl pillow - HomeGoods!

Teal burlap ribbon was used to create color and texture on the wine table. Tucked in a fall pick I made using these few items:


Fall Feast for Four


Rusty orange fabric and more teal burlap ribbon were the perfect touch to create my fall table. I love the owl salt and pepper shakers and cute fall mugs that read "Thankful", which is what I truly am! Both were Better Homes and Gardens from Walmart! 

I tied cute little paper gift tags to each of our pumpkins with our Initial. I layered different placemats to give it more dimension and texture.
I never throw away jars! I use them for small arrangements and they make great container's for things like silverware. A sprig of leaves tied with jute string brings fall to my "set the table centerpiece".


Fall in the Dining Room

The new drapes make the room! I was so happy they turned out as good as I hoped!


I wanted to keep it simple and casual in the dining room, so I used natural textures, like linen and burlap, with natural wood for casual fall gatherings with friends.

I use these fall picks throughout the rooms to add a quick touch of fall foliage. 


Well that's it! I hope you enjoyed my fall tour and I inspired you to bring in a little fall to your home! 

Y'all come back! 

Shannon

Thursday, August 29, 2013

Grandma's house gets a chic design scheme!

Let's start with the guest room. With  minimal budget and one week until the first guest, this was going to be a challenge for Lisa - my new design partner - and I! Hey, but who doesn't love a challenge? Especially, now that I have help!! Yippee!

Here's the before:


First we shopped her house for any thing we might could use to give us inspiration and we found some really beautiful Nautical art. So then we decided the blue and white color scheme would be perfect for her guest room. 


After we determined our design plan, we shopped for the "key essentials" to pull the guest room together:
  • Bedding
  • Window treatments
  • Lamps and a mirror for over the dresser

We were very successful! We found almost everything we needed at one stop shop - HOMEGOODS!

Here's the After!!!!

After we layered the room with our finds, it came together beautifully with her nautical art! My favorite is the Ralph Lauren bedding (shhh...it's a bed in a bag!). We paid $99 for the whole set. To make it feel more layered, we added a contrasting sham we found for $9.99, and DKNY euro shams in solid white $24.99. This trick helps break up the matchy, matchy bed in the bag look! 
Design trick: Got a matchy bed set? Simply go get a set  of contrasting shams to break it up...I prefer Euro's. Then simply layer a throw or solid blanket at the bottom. Finally  throw in a cute boudoir pillow to get that designer look!


We did not however find the drapes, so we came up with the idea of using navy blue sheets. I said, "that's great, I mean fabric is fabric!" and then we added the white grosgrain ribbon to them to give them that custom look. A whopping $60 for the drapes (read on to see how easy that was!). No one will be the wiser...they turned out amazing!
So with a little DIY magic, we got a beautiful look!

My Favorite thing in the room is the lamp, $39 at HomeGoods!

We dressed the room mostly with what her MIL already had.  The budget was limited, so we had to do a little "DIYing"! I made this super easy jute vase for a fresh bouquet of flowers out of a pickle jar and jute! 

Here's how we did our DIY projects for this room:

Jute Jar:
Glass jar
Jute string
hot glue

Simply start the jute by hot gluing it on to the spot you want to start then all you need to do is wrap the jute around to jar the width you want. Lastly, you finish off the end with another dab of hot glue. EASY AS PIE!

This is soooo easy I think I'm going home and adding the jute to all my glass jars and putting them around the house! I love the natural texture it adds to your space.


 Simple Sheet Drapes:
Set of Full flat sheets - 96" long
Roll of Grosgrain ribbon
Hem tape/fusible webbing
Scissors
Hem measure thingy (can you tell I don't sew)


Next, lay out the sheets to iron on the ribbon.  Then you have to follow the direction on your heat-n-bond hem tape. Using the hem measuring tool thingy, space the second piece of ribbon below the other one - we did 3.5 inches apart. 


To hang the drapes just cut a slit in the top edge of the hem on the back of the sheets on both ends, then tread onto your rod. That's it, it's that easy!

WE - I love that I can say that now! - are almost done with the living room! I'll post that room once it's finished  so we can share more simple and budget friendly design tips! 

Happy decorating!

Shannon 

Thursday, February 21, 2013

Three ways to use a dresser - outside of the bedroom!

This Thursday we are taking the "three way" out of the bedroom! The dresser is one very versatile piece of furniture...it's not just for the bedroom anymore. They can be used in more ways than you think. Why are they so awesome? One word, storage! And we can all use more of that!

So before you go out in search of the perfect console, wine bar, or kitchen island...think, dresser, dresser, dresser! I know what your thinking. Dressers can be as expensive as any other piece of furniture. Well, true, but I talking about reusing an old dresser or finding a good deal on Craigslist, and then reworking it to fit your needs. So put on your creative goggles when you are searching and get your DIY on!!!


The perfect console: Use one at the top of the stairs for a great focal point, or in a foyer, and use the drawers as a catch all for all that stuff that usually lands on your counters! Also, you can use one in the dining room or kitchen as extra storage for napkins, placemats, and silverware.
This one was in a model home in my nieghborhood and used on the landing.


The perfect wine bar: Use it as a place to keep your bar essentials anywhere you would put a dry bar in your home. I'm going to use one upstairs in the bonus room to keep from running up and down the stairs when I'm ready for a refill! :-) Check out http://www.today.com/id/3041440/vp/50743316#50743316, for more information on how Nichole Curtis transformed this dresser into a mini bar. You can even use the drawers to keep snacks on hand!


As a kitchen island: Ever wish you had more storage and prep space in the kitchen? Well converting a dresser to a kitchen island is your answer! If you think you don't have room, put in on casters and you can have a mobile island just when you need it.


Go to http://youresomartha.wordpress.com/2011/08/10/kitchen-island-dresser-the-reveal/, to see what she did to turn a plain old dresser into this multifunctional piece.

Just think outside the box when it comes to finding functional pieces for your home. There is nothing more versatile than a dresser! Have a great Thursday!

SH 
"Real life by design!" 

Tuesday, February 5, 2013

Creating My "New" Home: The Creative Room

Hey guess what? I'm building a new house! Can you tell I'm excited! Would you believe that of all the rooms that I get to decorate in the house, the room I'm calling the "Creative Room" is the one that gets me and the kids most excited! That's right. Not the living room.  Not the dining room or kitchen - the creative room! This room is going to be a shared room off the main hall upstairs where we can just let our creative juices flow! Etsy here I come! But of course it has to be stylish...I mean, come on, you know me!

Here's a little insight on how I get started on any project. This method really works to keep your room inspiration organized.

First, I get a file folder, so I can keep all my ideas in one place. Then, I begin my search for inspiration: Magazines, internet, of course, Pinterest!


One of my faves is Better Homes and Gardens magazine and website, they have tons of inspiration! I found several ideas in there January and February issues. When I find something I like, I tear it out and put it in a file. Look at this super cute file folder I found at Walmart for 3 for $1! This file even has a place to keep notes. Now you can't beat that!

Next, I start putting together all the ideas in the file. Everything from the color palette to the ideas for stylish organization.

This is exactly the way I do it! I usually sit on the floor with everything spread out around me and start organizing my thoughts.

Last, I just put it all together in the file and secure with paper clip. I like to write down the plan and add any fabric swatches or paint swatches, so everything is in one place! 

I found this bright, fun paint palette in the January BH&G Magazine. I, however, am using a beautiful color by Sherwin Williams called Sea Salt for the walls, with accents of yellow, coral, and green. It will blend beautifully with the colors in the rest of the house. 
  
Now I'm ready to go! 
I love the idea of having all my ideas in one place. So putting things together in the file makes it a whole lot easier. Plus, when I head out to start my shopping, I have my inspiration file in hand, and I'm ready to find those perfect pieces!

 I thought this would be a good way to share my process, as I plan out my design for each room. So, I will keep you up to date as things progress. We move in March 16th! Come along with me as I create my new home! God Bless!

 SH

Thursday, January 3, 2013

The Evolution of Home


Here we are in 2013, BTW Happy New Year!!!!!, okay that said, lets talk about home. No matter what you live in: a house, or a condo, or an apartment, it is still your home. To me, there is nothing more personal! Right now, I get to call a temporary apartment in the great state of North Carolina home. My permanent home is being built as we speak. Yay!!! Over the past 16 years, as I have been able to decorate 4 houses so far, my personal style and design priorities have evolved. I think as we get older we just tend to take on a deeper sense of ourselves and what is important to us. We don't rely on trends, but instead what we love. So this new year I decided instead focusing on resolutions, I wanted to focus on evolution! I see us evolving over time into something beautiful! After 41 years, I can say I am happy in my own skin and now I want to truly be happy in my surroundings!

My favorite room in my last house. My kids are my art!


This blog now is going to be about how to make our homes truly reflect our lives and the people in it. How many times have you picked up a magazine and looked at the rooms and thought OMG that's gorgeous! But when it comes down to it, it doesn't reflect our real lives! Yes, sometimes I want to dive right into the picture and start living, however, lets see; the sofa can't be white, that won't work with the kids, the coffee table, lets change that to an ottoman for safety and comfort sake, the open shelves, well as pretty as they are, I need to hide a few things, and while we are at it, I'd rather see my kids, than a picture of a bunch of fruit! In the end, it really isn't who I am!!! I have spent most of a decade trying to achieve a look from a picture that doesn''t reflect my life or the things I love. Take for instance butterflies. I love them and always have. I have one in just about every room in my house, even the bathroom! Those who have been in my house can attest to that! Why the obsession? I just love the idea of taking something not so beautiful and transforming it into something beautiful! (No offense to the cute little caterpillars!) That to me is how I see our lives, ever changing, transforming, evolving - if you will - into something better everyday. Right now, I am okay with who I am and I am ready for my home to be a reflection of my life!


Butterflies, okay and yes wine, makes me happy! :)
Here's a good example: this wall decor I used my last house. Not only does it reflect my love of butterflies, but I took a wine box from my ten year anniversary trip to Napa Valley, stained it, and hung it on the wall in my dining room. Now when I see this I remember the romantic get-a-way my husband and I had together. It has meaning! (Oh and did I mention this whole thing only cost $15!) It "tells my story", to quote one of my favorite decorators, Nate Berkus. He says, "Our homes tell our stories; they reflect the places we've been and the people we've loved along the way - and there can be no more beautiful design than that." I knew I loved him! I couldn't have said it better myself! I have just read his new book, "The Things That Matter" cover to cover - I think we are design sole mates, not to mention, both overly OCD Virgo's! Here's a quick side note for you Nate - if you were to ever read this - I, too, decant my eggs, and the coffee, and the mouthwash, and even my lotions! Hi, my name is Shannon and I, too, am a decanter! I even peel the ugly stickers off all the fruit, before I put it in a bowl! Phew! Glad that is out in the open! But guess what? That's me and I'm okay with that! Okay, sorry for that, back to the topic.

My current apartment home - I still wanted it to feel like home!

So, what I am trying to tell you is this new house I am about to design, will be a true reflection of me; my past, my travels, my family, the things I love! If I don't love it, it won't make the cut! I want it all set in my casual elegant style with a hint of rustic. Drenched in the soft neutrals; grays, browns, and creams. Then splashed with my favorite colors: orange, aqua, and green! It is my own recipe. A recipe that says, this is me - my home! Here's an idea, instead of hitting the stores for design inspiration...who am I kidding, I'll still shop just a little - I do have an Ikea now! - I will also be hitting the storage boxes in the attic for more personal inspiration! I hope along the way, I will inspire you to dust off the old family pics, scavenge the attic for memorabilia, and let your home speak to who you are! I will show you how to do it with style - budget friendly style, that is! You can also "like" my facebook page https://www.facebook.com/shcreatinghome, to get a more detailed play by play. Plus, I always share great home tips I find on the web!


Here's a poem I wrote for my mother many years ago on Mother's Day and it will make it into my home! Hmmm...the creative juices are flowing!!!!

"In a cocoon of love you gave me life, then gave me wings, so I could fly!"  ~ Me

Wednesday, December 5, 2012

No Home for the Holidays

Well, here we go again! This will be our third move in 5 years! Two of which have been over the holidays...my favorite time of year, mind you. For some reason we always tend to do this, put our house on the market in the fall and then it sells quickly. Now, no home for the holidays! 

Right now, we are building and the house will be finished in February, but that doesn't help the decorator in me who waits all year for that quintessential time when we all go into a crafty design frenzy to fill our homes with holiday cheer. No ribbons, balls, and bows - on my! How will I survive? Sigh. 

Don't get me wrong, I know that is not what the holidays are all about, but to me making family traditions is a part of the feeling of hope the holidays hold in our minds for years to come. My kids are at that fun age 7 and 10 when they still believe, and the magic of Christmas is still alive and brimming in their little minds. Everything from getting the tree and decorating it along with our favorite Christmas jingles, then ending the day with hot peppermint cocoa, to spending an entire day in the kitchen baking and laughing, then sharing the cookies with our friends!

It amazes me how much importance the home has in our lives and how much we miss it when we don't have one - especially this time of year. It makes me think how lucky I am that I will only be without one for a few months. So many people don't have a home to call there own. Maybe God puts us in these positions sometimes, so that those of us who do have, never forget those who don't. Plus, it helps us focus on those things that really matter...family and friends! It always brings me back to the whole reason I started "Creating Home".  Although, I focus on the decorating of a home, home itself means so much more! It holds memories, it's our nest, our safe place. I think after the first of the year I may take a different approach to "Creating Home", and focus on all things that make a home, not just the decorating. There are so many resources out there for that, but the everyday joys and struggles are truly the heart of the home. So, I guess that's what I'm saying - lets get to the heart of the home! Of course, I will still share my savvy decorating tips, as I create my new home, but I will throw in a little "real life" along with it. After all, isn't that my motto - "Real Life by Design"! I hope you will join me in this new venture and share with me your every day joys of home. Aaaaand those not-so-joyous moments, like living in an 700 square foot apartment, while your two kids share a room! Yes, this should be fun!

Blessings and Merry Christmas,
SH

I thought I would at least share some of my favorite Christmas moments from last year! Here you go, enjoy!

The hunt for the perfect Christmas tree...


Decorating the house in aqua, green, and silver and branches from said tree...


A little finger helping make burlap bows...
 to use around the house.

Napkin rings made of curtain rings that hold our Christmas words...
 then sharing a meal with family and friends.

Welcoming friends to the Handley home with a homemade wreath...

 and wishing you a Merry Christmas from our family to yours!