Wednesday, December 14, 2011

Super Easy Homemade Napkin Rings

These napkin rings can be used as place card holders, too!
Ever get caught with a more quests than napkin rings? I seem to have a lot of sets of 4 napkin rings and will sometimes just mix and match to make it work.  This time I decided to get creative in a pinch - literally! This napkin ring does double duty as a place card holder!

You only need a few simple items:
Glue gun
1" burlap ribbon (or cut pieces into ribbon size)
6 to 8  2" curtain rings with clips
6 to 8 old buttons
Floral wire


Here's how to make it:

  •  To form the bow just fold ribbon in a crisscross and hold, then pinch middle and secure with floral wire.
  • Glue button to the center of bow.
  • Holding the clip out and ring secure, hot glue bow to ring so that the clip is in the middle of the bow.
  • Pull napkin through the ring and clip a special note or name card to the ring. 
Be sure to have fun and be creative! You can use any type of ribbon or vary you colors!

Monday, December 12, 2011

Burlap, Branches, and Bows!


So, this year I decided that I wanted to start over! Out with the old Christmas decor and in with the new! But as you know, the holidays can be expensive, with presents to buy and parties to host. So I knew I had to get creative! Using simple items like burlap, branches and bows,  I created a beautiful holiday home!

I set out to get a few things to work with:
1 yard of burlap -$4.25
4 sets of blue, green, silver ornaments : $25
1 batch of icy branches - $21
1 spool 2"green wire ribbon - $4.99
1 spool of aqua/blue grosgrain ribbon - $2.99
Extra branches from the Christmas tree - Free
Branches from the yard - Free
Pine cones - Free
Total cost - $58.28 That's just a little over $50!

This week I want to share with you all of the homemade holiday projects I made using the above items.  I will also include instructions. Let's start with the front door!


 Here's what you need:
Glue gun
Grapevine wreath
Large wooden letter
Branch of garland
Pine cones
4 8" strips of burlap
Grosgrain ribbon
Floral picks

To start the project hot glue your wooden letter at the corners and attach to the wreath. Then glue your branch of garland to the bottom right hand corner and secure with floral wire. Then you need to glue your pine cones to the center of the garland.
Make each bow piece separate and attach the floral pick
Next glue a strip of ribbon down the middle of each of your burlap strips. Cut 2 strips into the bottom bow parts about 6" in length and cut a triangle at the bottom edge. You will need to gather each strip and attach to the floral picks. Take the other 2 strips and fold in half for the upper part of the bow. Gather those pieces at one end and attach to the picks, as well. I added a dab of glue to secure the picks.

Finally, just tuck the bow pieces into the pine cones to create the full bow. Make sure your pieces are all secure before you hang it on the door.

Enjoy your simple new holiday wreath!

Thursday, December 1, 2011

Three-way Thursday - Quick, easy, and free Holiday decorating!

Three ways to use the clippings from your Christmas tree to decorate around the house.
Use them to create a beautiful mantel display
I just asked the guy at the tree farm if I could have the branches leftover from the tree trimmings and he let me take as much as I wanted, FREE! By cutting them into smaller branches, I used them to create this beautiful mantel display. I used a grouping of pine cones from the yard and spread the branches out from there. I tucked in a string of lights and votive candles to add sparkle. All the other accessories were already on the mantel. The birds and vase of branches just added to that "winter wonderland" feeling I was going for.


Make a spray to use on mirrors or anywhere you want!
This one is easy and can be used all around the house. You can even make a larger one for the front door. All I did was group the sprigs together and tie together with floral wire. Next I added ornaments on a string to make it more interesting. Then I simply added a burlap bow to the top and hung it on my iron art in the dining room. So simple!

Tuck them around a candle
Simply tucking the branches around a hurricane candle holder helps give this entry way table  and dining room table that Christmas feeling! Again, I added candles, icy branches, and pine cones to pull it all together.
Create a holiday center piece for the table

With Christmas just around the corner, finding ways to save money is a must. I love that I was able to create that wintery holiday feeling by using natural elements, like tree branches, pine cones, and burlap, around the house. I love that wonderful smell of a fresh Christmas tree!  Best of all it cost little to no money at all! 

Please note they will eventually get brittle, they will usually last about 2 to 3 weeks.

Wednesday, November 23, 2011

Blending the Old With the New

I know many of you have this same dilemma that my clients had. You are stuck with hand-me-downs that you can't afford to or bring yourself to get rid of. Here I will give you some ways to give that old set some new life!
First find an inspiration fabric or something to start you off and build from there. We found this traditional print done in a fresh new way at Calico Home and used that as our starting point. We pulled in the wall color from the fabric which is BM Whitall Brown, then added the off white bead board wainscoting to keep it from feeling too dark. We made the drapes out of the fabric and to keep the cost lower we added an inexpensive brown to the bottom. We only needed 2 1/2 yards of the printed fabric per panel.You can do this trick with store bought panels, as well.
Grandma's Dining set is given new life!


If you have older chairs, we just slip covered these and added two new transitional chairs to the head of the table.  Now the set feels more up-to-date! The rug really adds that hit of contemporary to the room. We found this gorgeous dhurrie rug at William Sonoma Home on sale, it was a little bit of a splurge, but the result was worth it! The final touches like new dishes and accessories really pulled the whole update together. Now she and her family can have that sense of history by keeping Grandma's pieces. But at the same time, enjoy a fresh new dining room that reflects them. It's the best of both worlds!

Tuesday, November 8, 2011

My "real life" take on dining rooms!

They are the most neglected room in the home, but usually the first room you see when you walk in the door. Yes, we want them to look good, but how do we create a room that welcomes guests and can be used on more than just the special occasion? Here's my philosophy on creating a "real life" dining room.
Keep it casual and inviting!
I feel the biggest mistake we make is we create this formal space that is filled with the traditional dining "set". We paint the walls dark reds or brown and think we can only use the fine china. Then we  neglect the room for the other 362 days of the year! That is such a waste! Here's are the elements, as seen in the picture above, that I think make a more inviting space that you will use so much more than 2 or 3 times a year.

1. Keep the colors brighter - I love using blues and greens or versions of those colors against the deeper browns of the wood. You can also use warm soft neutrals, like It keeps the room from feeling heavy, dark, and stuffy!


2. Make the furniture more casual - I like using upholstered chairs, because they create comfort and make you want to hang out and relax at the table. I also think mixing in a different chairs or a bench to keep it casual is a fun idea. Mix in a more casual table. I love round tables, because they promote conversation. Then add in  a buffet for storage and serving. Just remember all the pieces don't have to match! You can even just slip cover an old console table.
A simple slip covered console keeps the room light and casual


3. Keep the decor simple and casual - You are not going to use the room if you have to unset the table and remove a bunch of bulky decorations every time. So a simple center arrangement is all you really need. If you have a long table add 2 candles on either side of the centerpiece. I like using baskets and natural elements to keep the feeling light and casual. Put your centerpiece on a woven tray or try a jute or sisal rug instead of a formal wool rug, plus it's less expensive!

Voila! The room will be ready to use! 
  • Use it for a change of scenery on the weeknights and make spaghetti night a little more special!
  • Don't have a sitter? Use it as a special date night room on the weekends to give a more elegant and romantic setting for dinner for two.
  • We use ours every Sunday as our breakfast room. Bacon just tastes better served in the dining room!
Most of all enjoy gathering together  and spending quality time with friends and family. I mean isn't that what "creating home" is all about!

*If you enjoy my blogs, please become a follower and share me with your friends!


Saturday, October 29, 2011

Sumptuous Saturday

Hola Fall!
SH/CH is now adding Sumptuous Saturday's to my weekly Creating Home blog and posts. I want to share an easy recipe and help set the table for some family time! This week we are taking fall south of the border. Always a family favorite!
Please feel free to share your favorite family recipes.
Create a special setting, even if it is just a Saturday night!
 Nothing welcomes the cool evenings of fall like a warm bowl of soup. This week I am sharing one of my quick and easy soups with you, Cheesy Taco Soup.  
Muy Delicioso!
Recipe:
2 cans of chicken broth
1 can of water
1 can Rotel Cilantro Lime flavor
1 package of Old El Paso Cheesy Taco seasoning mix
1 cup of corn
1 cup of black beans
2 cups of pulled rotisserie chicken
Serves 4
Combine all ingredients (you don't have to be exact with the measurements) in a large pot and simmer for 15 minutes. Serve with corn chips and sour cream for a yummy topping. 
You can double the recipe to serve more - and have left overs! 


If you like my blog follow me and share me to enjoy creative, practical, and budget-friendly advice to help you create your home!

Friday, October 14, 2011

Creating Cozy!

Bright and Airy Summer Decor

Goes warm and cozy for the cooler months!
Pillows From World Market all under $100
I have to admit, I was a little worried about how to take my living spaces from my bright fresh light teal blues and greens to the warm and cozy feeling we all crave in the colder months. Here's the easy of it all. Just change out your pillows! Pop in a warmer color and add deeper versions of the colors you already have! It will work I swear! My light smokey teal pillow paired beautifully with burnt orange and deeper teals to create that curl up by the fire feeling I wanted! Then just splash the same colors around the room in candles, fresh flowers, and accessories.
Now all I need is a fire!   


I added these cozy orange floor pillows beside the fire place by covering euro size pillows with some left over fabric from another project. Now there is a reason to get cozy by the fire! Other small touches like the deep teal candles and the orange flowering branches, add more of those warmer tones. A homemade spray of leaves, berries and pine cones finishes off the fall look!

See it's that easy! Now go and cozy up those rooms, cold winter nights are just around the corner!

Thursday, September 29, 2011

Creating Autumn

This easy-to-make arrangement is the center of attraction in this traditional dining room. Here's all you need: 3 hurricanes with candles, set of three plates to set candles on, stems of fall foliage and berries, small pumpkins and gourds, and large pine cones (from the yard). First, I lined up the hurricanes down the center of the table. Then place the stems of leaves and berries all around. Finally, I tucked in the pine cones and gourds. It was that easy!

Fall colored pottery made a perfect back drop for these stems of berries and leaves. I simply arranged the pottery in a triangle-like pattern, then filled one of the jars with fall berries. I used ready-made fall picks and tucked them in between the pottery. Be sure to use natural-looking picks that are full and colorful for a realistic look.

Coffee tables are the center of attention in the family room and a great place to add a touch of fall. By simply changing the candles to a burnt orange and popping in some fall blooms in the arrangement, I created a beautiful burst of autumn! I love that the birds look like they are nesting in a a bunch of fall leaves: it's a fun touch!
Welcome to Autumn!

Wednesday, September 14, 2011

How to Avoid Painting Disasters!

Yes, even design professionals don't get it right all the time!
First color was pretty, but way to Palm Beachy!


Okay, yes I admit, I don't always get it right! Decorators even struggle sometimes with the right tone of a color. Sometimes you think you are getting one thing and then you put it in the room and YUK! It turns out all wrong! Here's my advice to you, keep the tones shaded with gray and you are more likely to love it in the long term. Sometimes a truer  brighter hue works, but for me a grayer version of the teal was a much more sophisticated way to go. My big mistake was not getting the sample and I wasted $40! So the next tip is alllwayyys get the samples and test it out, then you know how to tone the color down once you get in the room. Maybe you'll get lucky and strike gold the first time!
SW6214 Under Seas, Perfect!
One more bit of advice. I ended up taking my spa blue pillow back to the paint store this time and was able to get a better match. So when in doubt always take a color inspiration with you. I went for a deeper value than the pillow or darker version to give some contrast, but it was still the same tone.

So for color success: 
  • Go for grayer or shaded versions of a color, it's more livable in the long term  (mainly in blues and greens).
  • Take something with you to the store for color matching or inspiration.
  • Always get a sample to test in the room.

Thursday, September 8, 2011

Three Ways to Style a Mantel

Most of us have them, yet are perplexed at how to make this focal point shine!
Let the Fireplace be the star of the room!

Of all the design issues I see when I first walk into a clients home, its how they have styled their mantels! I see the same thing over and over and I want to help! Most of you take this ledge and make it your gallery of keepsakes . Pictures of the family, the ubiquitous figurine, and a clutter of other small objects. The problem is where's the focal point? I am not saying you have to get rid of all the sentimental items, just let me show you how to display them.
Use one key piece of art in your arrangement

This is your basic mantel. By using the hanging art and the 2 sconces you have created a focal point that is in scale with the fire place itself. So now the whole fireplace is one cohesive unit. As you can see the other things are displayed with purpose and in an asymmetrical way. This gives it more interest. But at the same time they match in scale. You could put the 2 planters on either side and make a more symmetrical arrangement as well.

Don't fight the stone with busy art!


For those of you who are lucky enough to have the natural stone as your fireplace, this one is my favorite! Because quite simply the art is in the stone, so the use of simple art, like this one, doesn't compete with the stone. I will typically use an antique mirror to contrast with the muted stone. Candle sticks are always a go to accessory for any mantel, just make sure the size matches the scale of the mantel.


Of course, now a days we have big black boxes, aka the flat screen TV, above the fireplace. One cool way to make it less visible is to paint a darker color on that wall to lower the contrast. See in this picture you notice the fireplace and not the TV! Then keep the accessories simple, to keep it from being too distracting.


Hope this helps!


Tuesday, August 30, 2011

Destination Style

As a decorator and a Psychology major, I pride myself in figuring people out. The biggest compliment I get from a client is this is so me! I love for the rooms I design to reflect the people that actually live in them and not just create a pretty room. So how do I do it? Well it's simple. I ask the right questions! The one question I ask that really helps me determine a design direction is, "Where is your favorite vacation spot?". Believe it or not this one question tell me a lot! Does the person like beach or carribean vacations or hiking in the mountains or a trip to Italy. What ever it is, it tells me how you want your room to feel. But lets get one thing straight, don't get too literal! I am going to give you some fun style tips for whatever destination you choose.
Destination: Beach!
HGTV Home for Sherwin Williams Coastal Hues


Creating Home client's family room: Classic, with a hint of tropical.
Elements of beach style: Colors Inspiration: Sand and water hues like aquas, teals, blues and greens.  Use natural textures, like rattan, jute, and linen. Keep the feeling light, airy, and casual. A white slip covered sofa with a mix of watery blue and green pillows anchored with a sisal or jute rug, work great for this style. Soft breezy curtains in linen or just sheer would finish off the look! For this room I wanted a hint of a tropical feel, but kept it classic, so it doesn't scream tropics!


Destination: The Great Outdoors!
If this is your scene, then I have a style for you!
  
NATURE CHIC!
I love this style! It's warm and cozy and pulls colors directly from your backyard. Color Inspiration: leaves (especially in the fall), trees, branches, moss. My favorite color combo is browns and yellow/ greens and punch in a bit of orange to keep it fresh! The key elements of this style are natural textures, mixed with warm and cozy fabrics, and keep it clean and simple. A nature inspired rug would be a great place to start, then pull your palette right from there. Picture a leather chair with an ottoman by the fire draped with a cozy chenille blanket. I can feel the warmth already!

Destination: European Vacation
Deeply routed in tradition this style has staying power! BHG.com

This style is uber traditional and timeless! Think of the lines and details of the European architecture. Color Inspiration: European countryside: Soft olives and blues mixed with warm golds and browns. And what about red? That will keep it alive!. Add in some rustic touches like old shutters and mix in some antique nesting tables to keep the style from becoming too stuffy. I love the artistic treatment on the wall behind the sofa. It gives the room whimsy and interest. I like the way the pillows don't match and the trims are all kept simple. This way it feels more updated and not grandma - no offense Mimi!

So if you don't know your design style. Just close your eyes and picture yourself in your favorite vacation spot. Then pull those elements into your space to achieve destination happiness!

Saturday, August 13, 2011

Stylish Storage!

Functionally Chic Storage Solutions
You know you have it! That's right clutter! Everyone has it and doesn't usually know what to do with it. I was focusing on kids spaces this week, so to me this was the perfect topic. Because if you have kids, you have clutter! As a decorator, I am always looking for that functionally chic solution to hide the everyday stuff we all have. So I am going to give you some of my tricks for hiding the stuff we don't want to see! In this family room pictured above from Betterhomesandgardens.com, I love the use of the entertainment center for additional storage. Here are 3 ways to sneak storage into your family room:
1. Pick the right furniture. A simple console table can act as additional storage, if you buy one with shelves or cabinets underneath. I even use a chest of drawers in my family room as a table and the drawers are used for games and movies!

2. Use baskets or decorative boxes under your coffee table to hold newspapers, magazines, and the remotes. They can also be used to hold a few toys for easy access and clean up.

3. Storage ottomans rock! They are the most versatile pieces in a room. Put the clutter inside, flip the top for an extra small table, extra seating in a pinch, and of course, put up your feet!


Dish buckets make great storage for boys!

For kids rooms I like to use baskets and bins, but I wanted to share another budget friendly option. In my 5 year old's room I had 8 cubbies to fill and wicker and a boy just wasn't a good combo, so baskets were out of the question.  The canvas boxes were $7 a piece and I needed 8, that's $56! On a tight budget that wasn't going to work. So, as I wondered down isle after isle of storage bins, I came across these. They are dish buckets! Best of all they are plastic and portable and $1.99 a piece. They are also indestructible and came in a variety of colors. Sold!


Let's visit the softer side for the girls in our lives. Aside from the obvious storage, I like using multifunctional pieces. For our little social butterflies, a storage ottoman (can you tell I love them) works double duty. It's extra sitting if when the friends come to hang and storage for the things she may not want them to see! Hello froggie!

One last little bit of advice. For an unconventional way to add storage use pegboard! I have fallen in love with all the cool gadgets you can get to use on it. Although, it's usually meant for the garage, with a little spray paint you can make a stylish and functional storage wall! Now that's functionally chic!

Friday, August 5, 2011

Updating Kid's Rooms


5 Rules For Creating Kid's Rooms


Pick a color that can grow with them!


Rule # 1 (Probably the most important!) - Let them be the designer! Go through the Internet, kids catalogs, and magazines and let them find rooms they love.  Then hit the paint store and have them pick 3 of their favorite colors! Then make a plan based on your inspiration. I like to use a folder and put my colors and ideas in it, use it to help you shop. (One tidbit of advice is don't let them get too "themey", they may be into princesses and Spiderman now, but they will soon change. Trust me!)

Rule # 2
- Of the three colors, pick the one that will be most likely to grow with them. For instance, pinks of any kind can tend to be short lived with girls and for boys the lighter blues are the same. That's why we picked this Tiffany box blue by Olympic paints called, Reflection Pool. This color is sophisticated enough to grow with her. I like the grayer blues, like slate blues for boys or browns and tans, they just have more longevity!

Rule # 3 - Use what you have! Be creative and think about what you have and update it with paint. I took this table that looked "fairy princess" and transformed it into "bohemian chic" with white glossy spray paint. Then I only had to update the accessories, this lamp was $12 and clock was $5 from Target! Total cost of the new look $22! Also, look at other things in the room and only replace things that are necessary. I kept all the furniture and the green sheers curtains, because they would still work in the room. That's why I always tell clients don't by "character" or baby-like pieces to begin with. Stick to buying classic pieces that will stand the test of time, or the test of kids!

Rule # 4 - Don't break the bank on the bedding! If there is anything that is most likely going to change in the coming years, it's the bedding. Also, it's an easy way to make a subtle change with out changing everything.  So I don't like using custom or high end bedding for my kids rooms. This whole bedding set was $56 from Walmart.com and it came with the comforter, sham and 2 super cute accent pillows! This way if she changes her mind in a year or two, or something spills (these are kids!) you won't have a heart attack!

Finally, Rule # 5 - Let the kids be the artist! I love letting my kids participate in the art for their rooms. Either frame their creations or let them help with the painting and color selection of the art project.  To recreate this art all you need is:
  1. 3  11 x 14 frames you can paint
  2. Acrylic glossy paint in your colors
  3. 3 Sheets of scrapbook paper - let them pick it out to match
  4. 3 wood letters
  5. 3 white mats, if the frames don't have it already.
Just paint the frames  and letters, then once it's all dry frame the paper. Then hot glue the wood letters to the front center of the glass. It's that easy!
So, hopefully this helps to make tackling those kid's room a little easier on you and your wallet. 
One last thing, HAVE FUN

Tuesday, July 26, 2011

5 ways to add a splash of citrus to your home

Who doesn't love a splash of sunshine in there home? Whether it's lemon yellow or lime green, these are happy colors! So why not add a touch of citrus to your rooms, even if its just in the laundry room  (couldn't we all use some happy in there?).
I am going to show you five ways to do it, so lets get our citrus love on!


 1. Add pops of yellow with your accessories. Yellow Lamps are easy to come by these days and are easy to change out when you are ready! (Try HomeGoods they have fun colors for great $$$)

2. Quick and cheap way to get new pillows in the color you want is to buy 20" napkins and sew 2 together and slip cover your existing pillows. (Target has a great selection)
Find a Great Yellow Fabric or Just Add Flowers

3.
Recover a tired piece of furniture with a beautiful yellow fabric to give it a fresh new look!

Citrus Spritzer
4. Fresh flowers are a great way to add a pop of color with out much committment. I love hitting the grocery store weekly for the 3 for $12. Buy like blooms and cut them in a large bunch and place is small vases around the house.

(Cool off with friends with this easy and refreshing drink! 1 part Pino Grigio, 1 part lemon/lime soda, add frozen lemon/lime slices. Enjoy!)


Use Actual Lemon and Limes

5. Lastly, and most obvious, is to use actual lemons and limes to create a great centerpiece for your table or counter tops. Gather a bunch on a tray or in a bowl. Use them to fill a series of tall glass vases to add a splash of color in the kitchen. They are inexpensive and can be used throughout the week to freshen your drinks!

Thursday, July 21, 2011

Three-way Thursday, Ottomans!

Use multiple ottomans for more versatility!
Maybe you are not aware, but there is a piece of furniture that I feel is a workhorse for the home. Creating family friendly environments is my goal for my clients and rarely do I not use an ottoman some where in the design. I counted and I have 7 ottomans in my home! So what makes this piece so multifunctional? Well, lets just see. First, do we not usually put our feet up on the coffee table? I can remember getting yelled at for doing it! Use an ottoman and you have built in comfort. If you think you need a hard surface, use a large tray for a place to put books and drinks or even a simple vase of fresh flowers.
Look at this comfortable and stylish family room!
Need another reason to choose an ottoman, over it's hard surfaced counterpart? If you entertain on a regular basis, then you know how important seating can be. So, in a pinch use your ottoman as extra seating! Just remove the tray and pull it to the outer side of the room and you have a conversation pit and room for two more guests! This family room is perfect for gathering and you can add a punch of personality to the room at the same time.

Another reason these work great in a family room is there are no hard surfaces for little heads to hit. I don't know about you ,but my kids can get a little rambunctious and as a Mom I know that they are safe! I do, however, recommend leather if you have small kids, it's much easier to clean!

They are great in bedrooms, too!
Finally, believe it or not, ottomans are not just for living rooms.You can use it in other rooms, too. I love using it in a bedroom as a bench at the end of the bed or on a wall next to the closet as a place to put on your shoes and socks in the morning.

I could go on and on at how functional and versatile this one piece of furniture is. So, if you are in the market for a coffee table, more seating, and a safe piece for the kids - think ottomans!

Monday, July 18, 2011

Color me happy! Opposites Attract


Opposites attract attention, that is. In other words, contrasting colors create a more interesting room! What is contrast you ask? It's the designer's trick to making a color pop! If you want to go bold with color think about opposites on the color wheel. For instance blue is a great color and can be very relaxing, but add orange and all of a sudden you have drama! The same can go for many other colors, like greens and reds. Just look at the room above and imagine it with out the pops of orange, it just wouldn't be the same.

 If you want to kick up your color palette a notch, let the color wheel be your guide and use contrasting or opposite colors in a room. How awesome, would it be to have a room that you don't want to leave and makes your friends say "Wow!"? That's the power of color and using it the in just the right combination.  So, if you are stuck with a boring room, pick one of the colors and pop in it's opposite to give it drama!

Tuesday, July 12, 2011

Create Restful Spaces

Leave it to HGTV and Sherwin Williams to help us out!

It's the end of a hectic day and all you want to do is retreat to your room and relax. So how do we create a room that quietly invites us in to sit and let all the chaos melt away. There is a way and believe it or not its as simple as picking the right colors!


 There is a formula for every room and the formula for a bedroom should equal  calm and serene. What does that mean? Well, the first part of the formula comes from creating a functional and organized space. If you find you are throwing your clothes all over the room and you have no where to put your stuff, you have to address that issue first. So my solution would be create more storage. Messy doesn't equal calm. Maybe it's time to do a closet clean out to create more space. Now lets address the formula of color to use in a bedroom. In the design world we use the term shades of a color differently than you. To us it means how much black and white, or gray, is added to create that shade of blue or green. Spa blue is simply a blue/green color that has been shaded with gray to quiet down the intensity.  It creates a softer and more livable version of the color which means it's perfect for a bedroom.  Check out these colors From HGTV HOME for Sherwin Williams called Neutral Nuance perfect for any room you want to create a soft calm environment. And you can use them in any combination throughout your home.

The next part of the formula is contrast. That basically means light versus dark in the room. For instance lets look at black and white the highest of all contrasts. The combination of the two colors creates a lot of drama, not calming at all! So think about that when you are picking your colors, don't go to bold with the level of values you use in the room. Keep the contrast low and quiet. However some contrast is good and keeps the room interesting. Like, I love to use a combination of warm and cool for contrast instead of light and dark. I love the warmth of the wood tones mixed with the coolness of the grays and blues. Also, use contrast in the mix of textures on the bed linens. Soft sheets with a quilted coverlet with linen pillows keeps the bed from being boring! So here's the Formula:

No mess + Shaded Colors + Low Contrast = A Restful Space

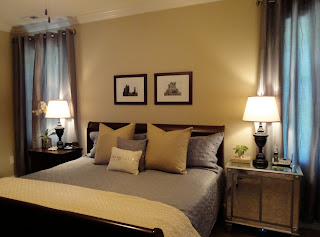
Although my room is not finished, I thought I would show you the start of my restful bedroom.  My walls are still builders beige, so I will be painting soon. I was thinking of using SW 7609 Ethereal Mood or the Escape Gray on the walls (see above). The name itself says it all! I will show you a picture when it's finished.
My Master Suite - Still in Progress!